Syam
Web Developer & IT System Administrator

How To Uninstall Programs In Windows 10
Over the passage of time, every Windows installation needs some type of cleanup. If you have installed multiple software and programs, you should uninstall the ones which you don’t use anymore.
In this article, we will show you different ways to uninstall programs from your computer easily.
What is uninstall?
Uninstall means to remove or delete an application or file from a computer. Most Windows programs installed in the Operating System come with an uninstaller to remove the program and its data from the computer.
The ability to uninstall software is essential to keep your computer clean by removing unneeded files. This ability is provided by Microsoft Installer Service (MSI). It provides an API for external apps that can be used to install, maintain and remove software easily.
There are many ways to remove programs using Apps and Features, uninstalling using Command Prompt and PowerShell, and using the new WinGet utility from Microsoft. There are third party uninstallers which enhance the uninstall functionality by adding new features. Let’s discuss each way here.
Uninstall the program using Apps and Features
Windows provides a graphical way to uninstall programs from the computer. In Windows XP days, it was called Add or Remove Programs, in Windows 7, the name changed to Programs and Features. In Windows 10, it’s called Apps and Features.
To open Add or Remove Programs or Programs and Features in Windows 7, go to Control Panel –> Programs and Features.
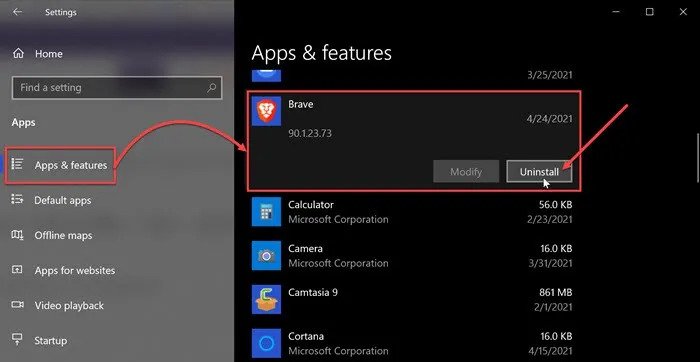
To open Apps and Features in Windows 10, go to Windows Settings –> Apps –> Apps & Features.
Select the program you want to uninstall and then click the Uninstall button.
Uninstall programs from the Start Menu
Most programs are listed in the Start Menu when they are installed in Windows. Microsoft provides a direct way to uninstall apps from the Start Menu.
To uninstall the program, open the Start Menu and search for the program to remove. You will get the option to uninstall the program from the open menu.

This method is very similar to the above mentioned method. Both methods use the same uninstall process.
Uninstall the program using command prompt
You can uninstall installed programs in Windows using Command Prompt but there are a few limitations. Let’s discuss the limitations first and then we’ll move on to the steps to uninstall the program using CMD.
The biggest limitation of using CMD to remove the installed programs is that it can only uninstall the programs which were installed using Microsoft Software Installer service (MSI). Most programs make use of MSI to install themselves as it becomes easier for them to update and maintain themselves.
- Open Command Prompt (CMD) as administrator.
- Run the command wmic and press Enter to continue. Your prompt will change to something like wmic:root\cli>.
- Now run the command product get name. This will list down all the programs installed using Windows MSI service.
- To uninstall a program, run the following command: product where name=”product name” call uninstall.
- It will ask for confirmation, press Y to confirm.
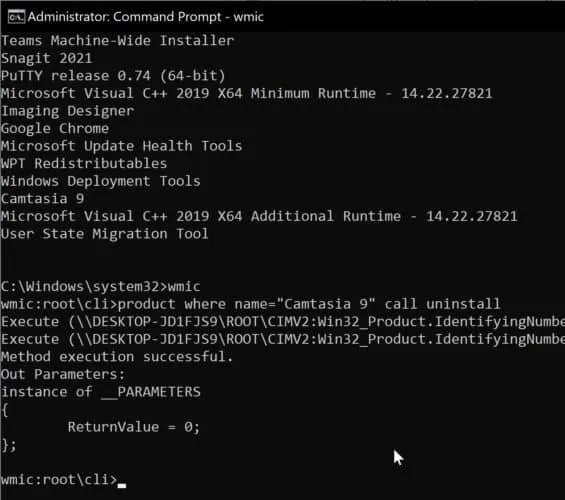
If the uninstallation process is successful, you will get the message “Method execution successful“.
Uninstall programs using PowerShell
You can also uninstall the programs using PowerShell commands. These commands can be useful if you want to automate the uninstall process on multiple computers.
- Open PowerShell with administrative privileges.
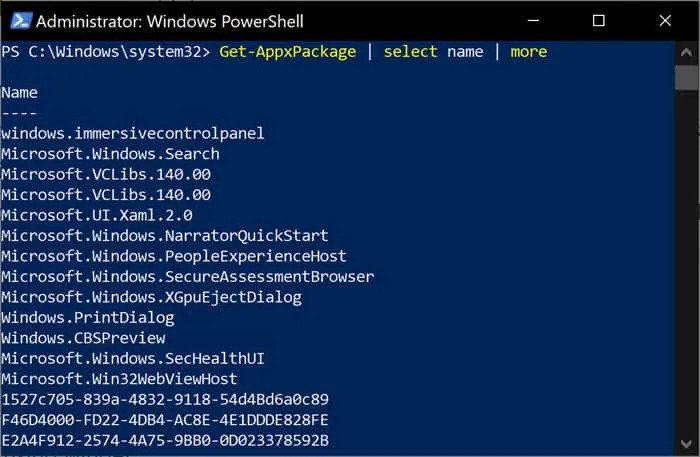
- Run the following commands in PowerShell: Get-AppxPackage | select name | more. This command will list all the packages installed in the system.
- Run the following command to uninstall a specific app: Remove-AppxPackage PackageName
For example, if I want to uninstall the Microsoft Edge Canary build, run the following command:
Remove-AppxPackage Microsoft.MicrosoftEdge.Canary
The limitation of using CMD or PowerShell to uninstall programs is that they can only remove Microsoft related apps or the apps which are using MSI APIs.
If you want to be able to uninstall all the programs from your computer, you will need to use winget for this purpose.
Uninstall the program using Windows Package Manager (winget)
Microsoft released Windows Package Manager (winget) to install and remove programs using the command line. This concept is very similar to the command line utilities used by Linux and Mac. This utility can be very helpful in installing programs as it can automatically check for dependencies and also install the dependencies along with the program.
Users can make use of different repositories from where programs can be selected and installed using a few simple steps. Winget will automatically download the program, download and install all dependencies and then install the program.
- Go to Download the package named Microsoft.DesktopAppInstaller_8wekyb3d8bbwe.appxbundle.
- Run the downloaded file to install winget on your computer.
- Once installed, you will be able to run winget from Command Prompt or PowerShell.
Open PowerShell and run the following command: winget features. Make sure the features related to uninstall function are enabled. If they are not enabled, follow the steps below:
Run the following command: winget settings. This will prompt you to open a file. Open the file in Notepad.
Add the following code before the closing parenthesis and save the file.
"experimentalFeatures": {
       "experimentalCmd": true,
       "experimentalArg": true,
       "experimentalMSStore": true,
       "list": true,
       "uninstall": true,
       "export": true
     }

Once done, run the following command: winget list. This will list down all the installed programs on your computer.
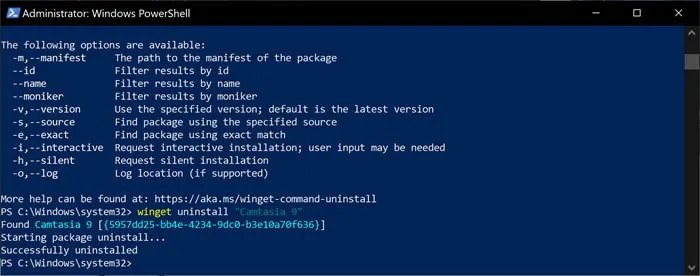
To uninstall a program, run the following command: winget uninstall AppName.
For example, if I want to uninstall Camtasia, the command will be: winget uninstall Camtasia 9