
Syam
Web Developer & IT System Administrator

How to Fix Connected Wi-Fi But No Internet Access
You are at your office and everything on your laptop seems to be working fine, but the moment you try to connect your PC to your home wi-fi, it stops working. You are connected to your Wi-Fi router but your screen says “No internet, secure” or “Wi-Fi connected but no internet.” Such a scenario can be frustrating.
Such a message on your Windows device means that your wireless modem/router or your access point is connected to your PC, but it cannot surf the web unless the problem is removed. Well, what might be the problem? This article discusses various scenarios and how you can troubleshoot your PC, its wi-fi network adapter, and your modem accordingly for a successful internet connection.
Before we begin the troubleshooting guide, we need to understand how Windows detects if it is connected to the internet or not.
Windows ability to detect internet connection
A Windows component, known as the Network Connectivity Status Indicator (NCSI), is responsible for the internet connectivity display in the Taskbar. NCSI is part of the Network Awareness program.
The NCSI works in two critical steps to check the internet’s status that the computer is connected to. These two tasks are performed independently.
- NCSI performs a DNS lookup for www.msftconnecttest.com, and then sends out an HTTP Get request to http://www.msftncsi.com/ncsi.txt and downloads the text file. This is a plain-text file that contains “Microsoft connect test.”
- NCSI also performs a DNS lookup for dns.msftncsi.com and checks to see if the corresponding IP address is 131.107.255.255.
From step 1, if the text file is received containing the exact match, Windows establishes that the computer is connected to the internet. If, however, the text file is not downloaded or has been redirected, NCSI moves on to the second step.
Once NCSI resolves for dns.msftncsi.com, it checks if the page is accessible. If the page is accessible, the network icon in the notification tray shows that it has internet access. However, if the NCSI is unable to perform its function, it will indicate that there is no internet availability, even though the computer is able to access the internet through the browser and ping other IP addresses.
Now that we understand how the Windows internet detection mechanism works, we can better troubleshoot the issues we are facing.
The next thing we must focus on is determining the source at fault: Is it your Windows device, or is it the router? Or maybe there is a problem on the Internet Service Provider’s end.
Determine the source at fault
The simplest way to quickly rule out which end is at fault for the no internet connection is to check whether there is only one device that faces the issue, or are there multiple devices? If you find that other devices on the network are also connected to the wi-fi but have no internet access, it is likely that the issue is at the router’s end, or with the ISP.
However, if you find that other devices are functioning normally and have internet access, and only one device does not have access to the internet, then there are more chances that the issue lies within that device alone.
Reasons for no internet access
There can be a number of different reasons why your device may connect to the wi-fi router but does not have access to the internet. If multiple devices on the same network face this issue, it could be due to either one of the following reasons:
- An issue with the router.
- Misconfiguration of a newly installed access point.
- An issue with the ISP.
If you face no internet access on only one device, then any of the following problems could be the reason:
- Corrupted TCP/IP stack.
- Misconfiguration of DNS server.
- Misconfiguration of IP address, subnet mask, or gateway.
- Outdated wireless adapter driver.
- Mismatched wireless IEEE standards.
- Third-party antivirus blockage.
Let us now continue to troubleshoot all related devices for both scenarios.
Fix Wi-Fi connected but no internet access
Single device cannot access the internet
As we suggested earlier, when only one device on the network cannot access the internet, it is likely that there is an issue with that device only, since other devices are functioning normally. Here is what you can do to fix the problem:
Confirm no internet access
It might be possible that your Taskbar is saying that you have no internet access, but in fact, you do. Yes, this could potentially happen if your organization or router is configured to block DNS lookups for Microsoft servers that control what your wi-fi icon says.
Open up a web browser and visit any website on the internet to confirm whether your device can access the internet or not. If it does, you will require no further troubleshooting and simply ignore the “No internet, secured” label beneath the Wi-Fi connection. If there is no internet access via web browser, continue down to the steps below to rectify the problem.
Clear TCP/IP stack and renew IP address
Transmission Control Protocol/Internet Protocol is responsible for carrying packets from one source to its destination target. This protocol involves a three-way handshake, which means that three packets are exchanged between the source and the target before exchanging the actual information.
Repeating these handshakes repeatedly would significantly increase traffic on the network. Therefore, the data is cached and stored locally on the device to avoid unnecessary packet transportation. Over time, the cached data can become corrupted, which results in failure to connect to the internet, even though all other configurations are done right.
In this case, the TCP/IP stack needs to be reset to make room for new, fresh entries. Refer to our guidepost to reset the TCP/IP stack in Windows and renew the allotted IP address via DHCP.
Configure static DNS
A misconfigured Domain Name Server (DNS) can also cause your device to not access the internet. If you still face the same issue after resetting the TCP/IP stack, you should try and configuring a static DNS on your machine.
You may refer to our guidepost to set static DNS using the command line, or follow the steps below to do so from the Graphical User Interface (GUI).
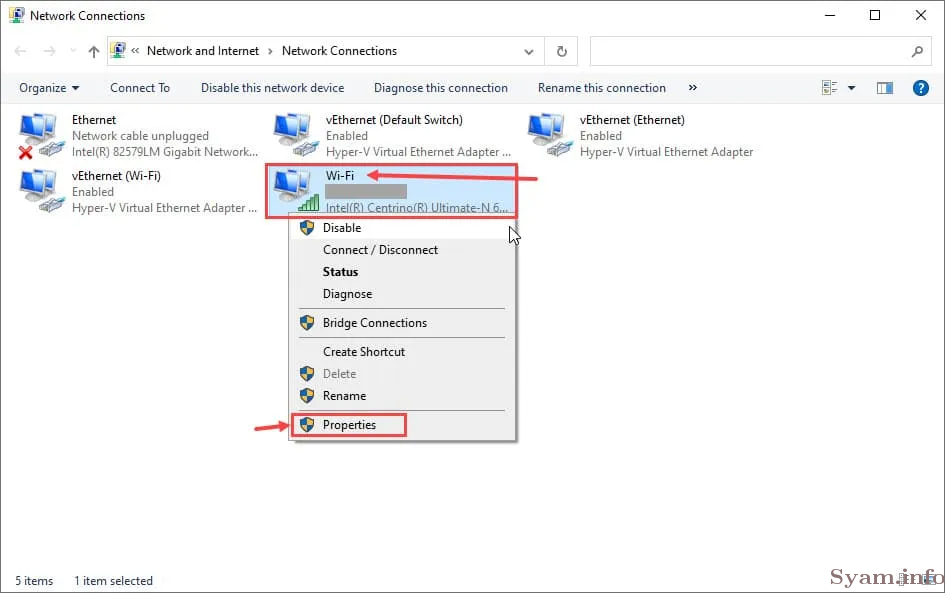
Type in ncpa.cpl in Run to open the Network Connections window. Right-click on the Wi-Fi adapter and select Properties from the context menu.

In the Wi-Fi Properties window, double-click Internet protocol versions 4(TCP/IPv4), and a new properties window shall open. From there, select the “Use the following DNS server addresses” radio button and then enter 8.8.8.8 as the Preferred DNS address, and 8.8.4.4 as the Alternate DNS address, as in the image below. Click Ok on all properties windows to save and close them..
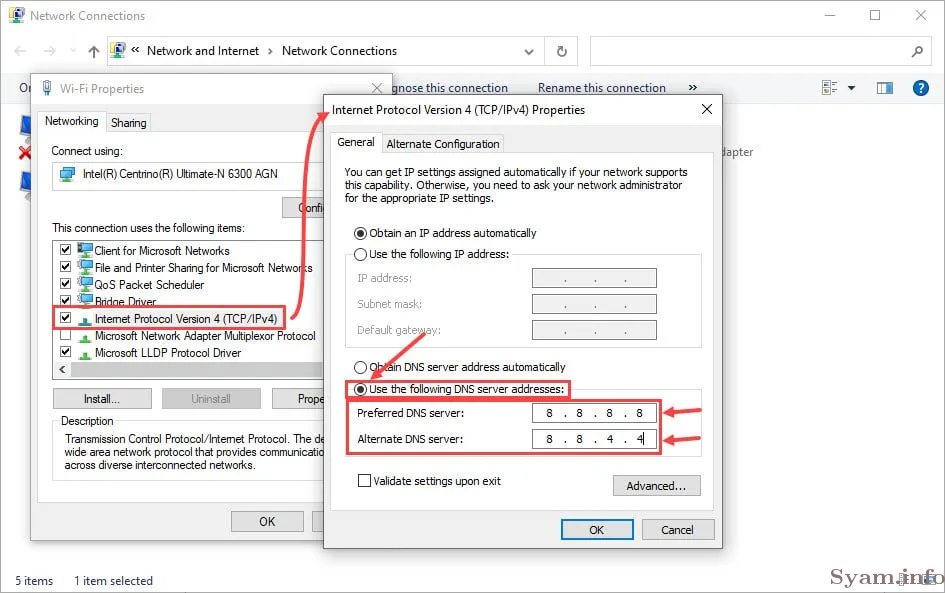
The DNS addresses just used belong to Google. These are the fastest DNS servers out there.
Update Wi-Fi adapter driver
An outdated wi-fi driver may also cause the device to behave abnormally and not be able to connect to the internet. We always recommend that you keep all of your drivers (and operating systems) up to date.
To update your Wi-Fi adapter driver, open the Device Manager by typing in devmgmt.msc in Run. Expand Network Adapters, right-click on the wi-fi adapter, and select Update driver from the context menu.

In the pop-up window, click Search automatically for drivers.
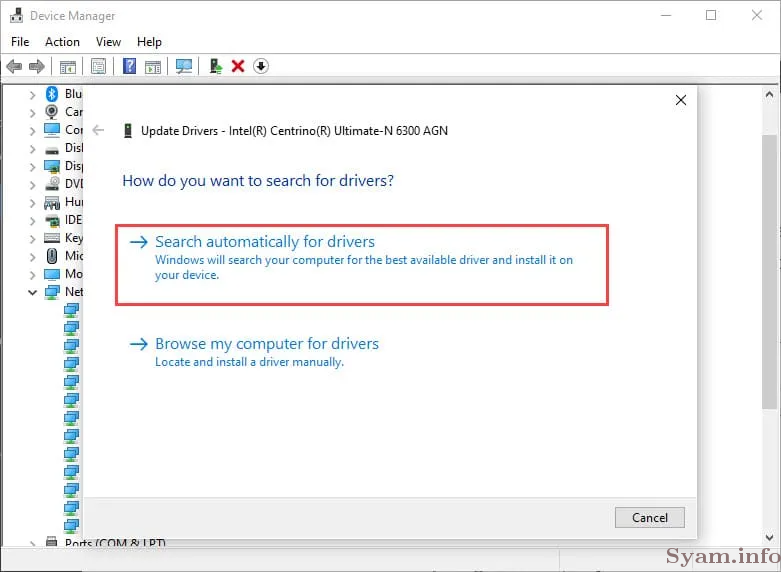
The wizard will now try and search for any newer drivers for the associated hardware. However, if you are unable to do so. We recommend that you visit the manufacturer’s website and manually download the latest driver (on another PC with internet access), move that driver in a USB drive to the affected PC, and manually install it.
Disable Fast Startup
Fast Startup is a Windows 10 feature that allows it to boot and load last-open content immediately after booting up. However, what it is doing is putting the computer in hibernation mode instead of turning it off completely.
The fast Startup feature can sometimes cause unstipulated issues in Windows and other devices, such as with the network adapter. Therefore, we suggest that you turn it off and check whether it resolved the problem.
To switch off Fast Startup, navigate to the following:
Control Panel -> System and Security -> Power Options
When there, click Choose what the power buttons do on the left. Then click Change settings that are currently unavailable.
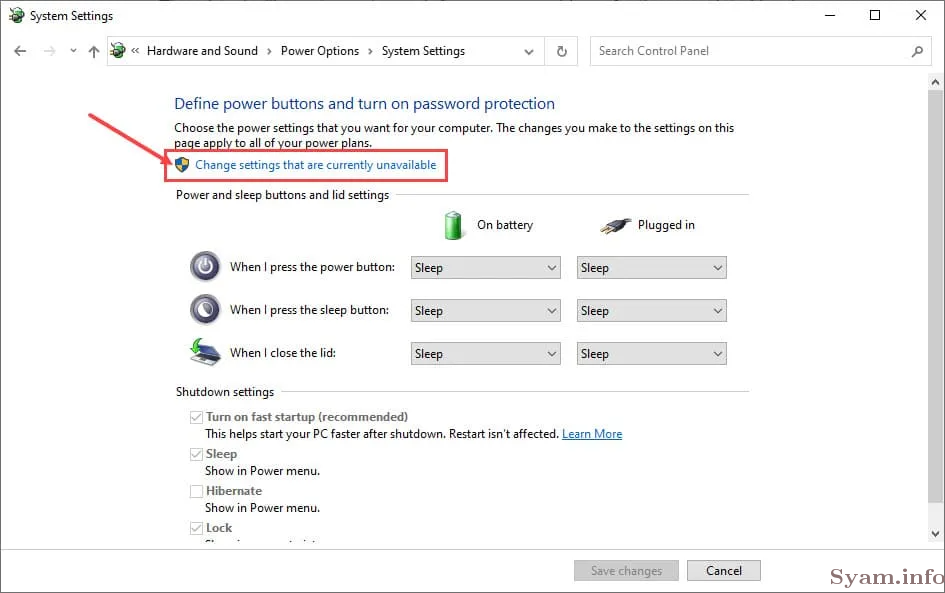
Now, uncheck the box next to “Turn on fast startup” and click Save changes at the bottom. Now restart your computer to implement the changes and check if you can now access the internet.
Turn off IPv6
Like IPv4, IPv6 is another Internet Protocol standard that most modern devices now support. All Windows devices that support IPv6 have both IPv4 and 6 enabled by default. This can often cause unanticipated network problems. Therefore, since most devices today support both versions 4 and 6, we suggest that you turn off version 6 and only work with IPv4.
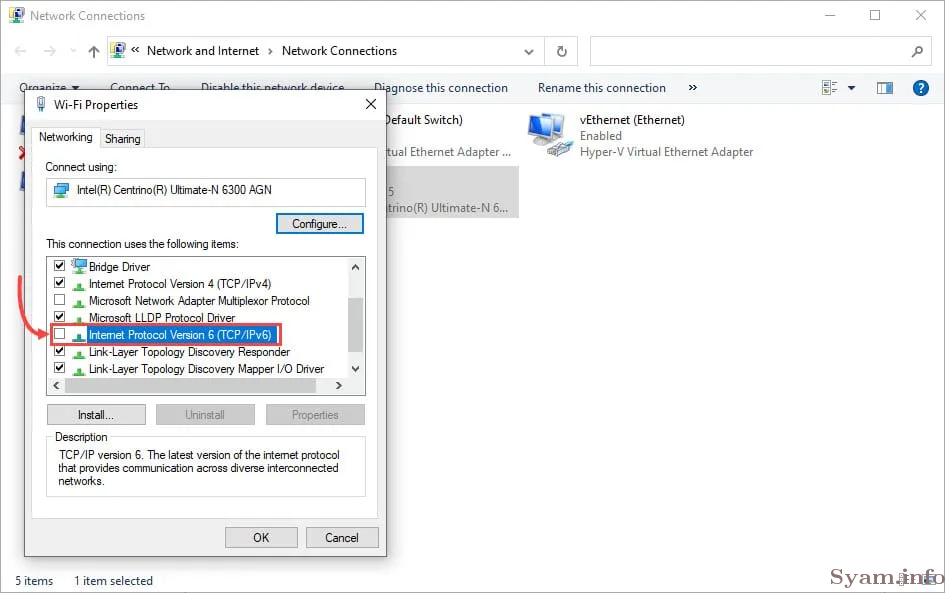
To turn off IPv6, open the Network Connections page by typing in ncpa.cpl in Run, and then right-click the Wi-Fi network adapter. Select Properties from the context menu.
In the Properties window, uncheck the box next to Internet protocol version 6 (TCP/IPv6) and then click OK.
Now check if you are able to access the internet. If not, there is still one more thing to consider.
Incompatible wireless standards/modes
The mode of communication between your device and your router is based on certain standards accredited by IEEE. These standards are 802.11g, 802.11ac, 802.11b, etc. It is implemented as a standard so that all wireless technologies having the same standard are compatible with one another.
It is possible that your router is old and supports an older wireless standard, whereas your Windows PC is relatively newer and does not support the same communication standard as the router. In that case, the standard will need to be manually changed. Here is how to do so:
Open the Network Connections window by typing in ncpa.cpl in Run, right-click the Wi-Fi adapter, and select Properties from the context menu. In the Properties window, click Configure.

The Wi-Fi adapter properties window will now pop up. Switch to the Advanced tab, select the mode under the Property box and then select Disabled from the dropdown menu in front of it. Click OK when done.

Your Wi-Fi adapter will now disconnect from the router and then re-connect. Check to see if your device can now access the internet.
Disable third-party antivirus
Third-party antiviruses can also block some content that they think is malicious and prevent you from accessing the internet altogether. If you are still unable to do so, we suggest that you disable or uninstall the antivirus software, reboot the computer, and check your internet connection again.
Multiple devices cannot access the internet
In case, more than one device cannot access the internet and faces the “No internet, secured” prompt, then it is likely that the issue is not with the Windows device, but on the other end, i.e. the router. Here are a few things you can do to remediate the issue.
Restart the router
It may seem illogical, but routers, being an electrical machine, often need a break and cool down just for a little time. Try restarting the router or the router as well as the access point if both are separate.
Physically switch off the devices and let them rest for about 30 seconds before turning them back on again. Allow them 3-5 minutes to become fully functional again and then retry connecting to the internet.
If the problem persists, try the rest of the solutions below.
Disable DHCP of new access point
If you have set up a new access point and can connect to it, but cannot access the internet, it is likely that you have misconfigured it. Recheck all the settings of the access point to ensure that any device connected to that access point can access the internet.
Usually, users tend to leave the Dynamic Host Configuration Protocol (DHCP) on before connecting to the router. In such a scenario, both the router and the access point have DHCP enabled causing an IP conflict, or 2 separate networks functioning on the same ISP without having Network Address Translation (NAT) – A method to map one network IP to the IP of another network.
Hence, we suggest that you disable the DHCP of the access point through its console interface.
Contact ISP
If you are still unable to access the internet even after performing all of the above tasks, we suggest that you contact your Internet Service Provider (ISP) as there is most likely a fault with their end. Ask them for guidance and maybe they can tell you that it is, in fact, a problem on their end they will solve it for you.
Closing words
Not having a working internet connection can be annoying, especially when you’re aware that every other device is functioning normally on the same network. However, these quick fixes will help you get over the issue in no time.
If you are facing a network outage on your mobile phone, simply try forgetting the network and re-connect to it, or reset your Wi-Fi configuration. If that doesn’t work, it is probably because of an issue with the router or with the ISP